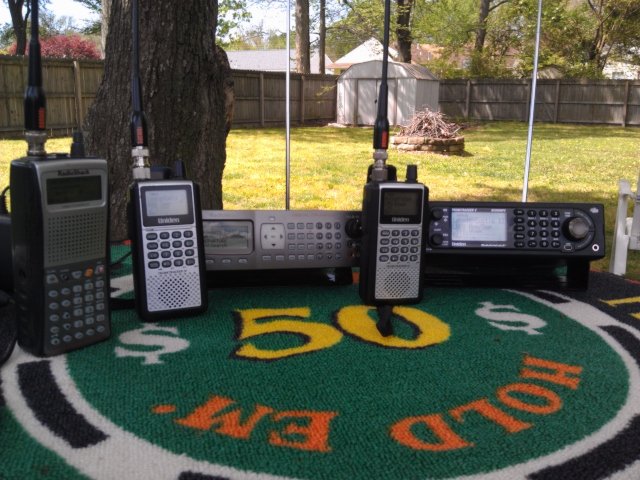
Yaesu FT-817 QRP ManPack Idea V3
Many hams enjoy outdoor field ops. Some work from a picnic table and others may dihg a foxhole and check their arcs.
Here is an idea that others may enjoy for their FT-817 radio

Many hams enjoy outdoor field ops. Some work from a picnic table and others may dihg a foxhole and check their arcs.
Here is an idea that others may enjoy for their FT-817 radio
I had the luck of having Charles provide a guided tour of the ARRL W1AW heqdquarters. At the end he proudly showed me what he did to improve his HF mobiling experience.
Here is a copy of his article. ARRL mwembers can find the actual article in the QST archives January 2010
This is specific to the ATAS-120 but it works great on my Super Antenna MP-2 and Hamsticks.
I had purchased a Yaesu FT-875D radio and ATAS-120A antenna in 2007. The ATAS-120 is an antenna designed to be used with the FT-857. It can be tuned to any frequency in the 40 through 6 meter bands from the car by simply tuning the rig to the desired frequency and pressing a tune button on the 857. I wanted to install them in our cars but did not want to mount the antenna on the bumper or trunk lid. So, I dusted off a Tri magnetic mount that I had been using with an old Hustler antenna. But a trip to Florida was being planned and I wanted a mount with more holding strength than the old Tri-Mag mount would provide for the higher highway speeds.
We have two cars and I wanted to be able to mount the antenna on each of them.
THE OWNERS MANUAL SAYS
The owners manual said “magnet mounts do not provide the RF grounding necessary for good performance, and are not recommended for use with this antenna.” To overcome this defect, I ran a ground wire from each magnet connecting bar to each side of the body of the car at the roof line. The vertical rubber gasket between the doors was able to be pushed aside just enough to drill a hole for a sheet metal screw, which was then invisible when the gasket was relaxed to its normal shape. I scraped the paint around the hole to insure a good contact. Because this involved drilling a hole for the ground screw, I had to get my XYL’s permission before drilling on her car. Her initial reaction was “drilling holes in my new car, no way” When I showed her where the holes would be, and that they would not be visible, she said “OK”. When the vehicles are sold the screws will not be visible. The coax cable was run along the rubber gasket into the car. Never had any water leakage!
THE BOX ARRIVES
I purchased a quad magnet mount. When the magnet mount arrived it was in a plastic bag. First thing that I did was cut circles of plastic/Saran wrap for each magnet and placed them on immediately to keep debris off the magnets. I am a firm believer in Murphy’s Law (ML) that says any scrap of metal, no matter how small, will be attracted to the magnets and will be impossible to get off, and will mar the car’s roof.
I anticipated a potential problem with the strong magnets and my watch so I took my wrist watch off when working with the mounts.However, I made the mistake of placing the magnet mount on an old metal projector table and had to take the cross bars off in order to get the magnets off the table individually. OK, so I am almost age 70 and not Charles Atlas. Each magnet has 200lbs of attractive force. With four magnets, that’s 800lbs of holding power. CAUTION: Do not get your fingers in the way!
NUTS AND BOLTS
I felt the cross bar between each set of magnets was not large enough for the hole for the SO-239. I purchased a coax cable with a long barrel, 1 inch, SO-239 on one end with the coax at right angles and PL-259 on the other end. This gives a very strong base for the ATAS antenna. I had a machine shop drill a 5/8² hole in a piece of aluminum stock, 11² long, 1 ½² wide and 3/8²thick. If you have a machine shop drill the hole be sure to take the connector with you to be sure it fits. (ML) The bar that came with the mount was just 8² long and 1/4² thick with two small holes for screws going into the base of the mount. I did not use it as I felt the screws would not be strong enough.
The bottom of the ATAS has two slots for an open end wrench but they are too narrow for a standard wrench. I had the machine shop make one as I wanted to be able to tighten the antenna beyond just using my hands.
When the antenna is not on the magnetic mount be sure to put the weather cap on the SO-239 to keep the water out. ML says you are going to lose it so get some spares at the hardware store.
For the rig, I pulled the carpet aside under the dash board and found a bolt that I could back out and I used it for a ground attachment to the rig. I used the threaded holes in the rig that the mounting bracket would be used for. If you attach the mounting bracket, MMB-82 to the dash board be sure to run a ground as many dash boards are mostly PLASTIC!!
NOT ALL ROOFS ARE CREATED EQUAL
The XYL’s car is a 2008 Toyota RAV-4 which has ridges on the roof running front to back. My car is a 2004 Dodge Neon and has a smooth but curved room.
To ensure proper fit-up for the XTL’s car, I placed a large piece of paper on the floor and traced around each magnet then placed the paper on the roof to get the position between the ridges. I then separate the magnets, two and two, with the connecting cross bar attached to one side only, using that for a handle. Astep ladder was necessary to get into the best position and have enough height for the installation. I suggest that you have someone to help.
I put the SO-239 in the cross bar 5/8² hole while the magnet pair was separated. This is necessary becuse there is NOT enough room to slide it in from under the connecting bar once the magnets are in place! I placed one set of magnets EDGE down and then lowered the pair to the vehicle roof. The fun part was getting the other pair of magnets down without my fingers being shortened. I had reversed the bolts so that the heads were down, closest to the roof, and the nuts were attached from above. That way the socket wrench would work the nuts from above and an open end wrench would hold the bolt in place from underneath, next to the roof. After getting the 2nd set of magnets in the proper position, the cross bar from the first pair of magnets was reattached to the 2nd set of magnets.
I use the Tri Magnet mount for my car with the smooth but curved roof. Because each magnet has to sit flatly on the roof, it was necessary to bend the cross bar between the magnets to accomodate the roof’s curvature. The machine shop bent the cross bar for me.
THE TRIP TO FLORIDA
The quad magnet mount was on the roof with the ATAS -120A antenna and the Yaesu on the dash board. I went on a test drive on I-91 through Hartford. There was a pileup on 17mtrs so I threw my call in and 4X4FR came back with a 5-9, thanks Rafi. The trip to Florida was flawless as the ATAS was tuned from 40mtrs to 6mtrs with perfect SWR. Contacts were made on all the bands with very good signal reports. The speed limit for most of the trip was 70 mph and keeping up with traffic was 80mph. That’s a lot of wind force on the ATAS antenna. The magnet mount did not move at all, even under these forces, and the antenna automatically tuned from one band to another without a problem. Keep an eye on the weather as a 20mph head wind could add up to 100mph of force on the antenna if you are at 80mph!
When we stayed at a motel the ATAS was removed from the magnet mount and the rig from the dash board and taken inside for the night.
WATCH THE HEADROOM MAX
A consequence of a roof mounted variable length antenna is that the antenna will hit low objects. We adjusted our driving habits to avoid drive throughs with roofs and mostly parked in open parking lots. Suggest you tune the ATAS to 40mtrs (the antenna is at its maximum height on 40 meters) and measure how high theheight of the antenna so that you’ll know what clearances you need. Keep an eye on tree limbs, power lines and bridges. While the whip at the upper portion of the ATAS-120 is flexible and can tolerate being bent back by low objects, having a low object hit the fixed body of the ATAS antenna would be disasterous.
THE BOTTOM LINE
I am more than satisfied with the performance of the ATAS and magnet mount. Suspect the radiation pattern is better than having the antenna mounted on the trunk or rear bumper. I feel other motorized antennas could be adapted to fit the magnet mount.
W1FTE got his license 5-24-1955, has an Extra license and is active on all bands from home and mobile. He is retired, is a Tour Guide at the ARRL every Tuesday, and advocates every ham to come to “Mecca’ when in the area. w1fte@arrl.net

Many listeners can benefit from using a yagi to improve signal reception at air shows and airband listening
The commercial air band is centered around 125 MHz and the Military airband would be 250 MHz thus one needs two yagis
Ken WA5VBJ wrote a brilliant paper on Cheap Yagis. I have made many of these and they work well and yes appeal to the cheap ham radio operator.
Click to access airband_ant.pdf
Click to access cheap-yagis.pdf
If you cant be bothered with the calculator you can use the 220 MHz antenna as it will work just as well and also be your ham antenna serving dual duty
 credit:AB9IL
 Blue Angels Communications cart
 N5XTC doing some listening
 oh look a squirrel
I had a tour of the ARRL HQ recently and it was a real joy to visit the birthplace of ham radio.
The old man Herman wasn’t there but I did get the grand tour.
I was not able to take photos of the test lab as they had the Yaesu FT-818 radio on the bench so expect a review in the September or October issue of QST
I also had a chance to get some souvenir items
The tour takes an hour to go through


Mt Diablo is a perfect summit for the car bound ham. You can basically drive right up to the summit and then take a quick walk to get to the high point. However, from the base of the mountain to the summit it will take a good 45 minutes due to the 15 mph speed limit and walkers and cyclists on the way up.
Washrooms, cold drinks, ice cream and a chance to buy souveniers will make this a summit unlike others.
This high point will allow contacts into W7 land as a bonus which was over 150 miles
I used my trusty FT-817 and MFJ 5/8 BNC whip.
HF bands sucked so I didnt bother and next time I go I plan to use a MFJ1820T whip on the radio and avoid the hassle of a 20 foot pole and dipole. This place may have restrictions on antenna placement so be aware as many national and state parks prohibit wires in trees.
Always a bonus to have an ice cream after making contacts.
It was a pleasure to make the first contact with Rex KE6MT who is active in SOTA and got me into having SOTA fun as a tourist ham.


Yeah Guys, for the tourist ham that wants to activate some SOTA while on a business trip, this summit is ideal. You can take the local bus to get there. I think I got off a stop early because I had to hike up the steep incline in the residential neighbourhood which is ideal to see how the locals live.
Once you get to the park entrance its a quick hike up to the summit. I found the trail a bit muggy and slippery due to a lot of moisture. It turns out I was in a dense fog that cleared briefly allowing some views then got back to a cold damp air. Pack a jacket just in case as the city gets fog very quickly.
The great thing about SFO is that many hams monitor 52 for QSO’s so you can make contacts quickly. I worked South San Jose which was 53 miles away. I used an FT-817 with an MFJ 5/8 wave antenna at 5 watts so the height really helps getting a signal out.


Saint Protector of Radio Amateurs SP3RN St. Maximilian Kolbe

If he is not the first he is certainly among the first to be beatified and then canonized among the victims of the German concentration camps. Pope John Paul II said of him that with his martyrdom he reported “victory through love and faith, in a place built for the denial of faith in God and in man”. Maximilian Kolbe was born on January 7, 1894 in Zdunska-Wola in Poland, from fervent Christian parents; his name at the baptism was that of Raimondo. Papa Giulio, a textile worker, was a patriot he could not stand the division of Poland at the time into three parts, dominated by Russia, Germany and Austria; of the five sons they had, only three were left alive by the kolbe, Francesco, Raimondo and Giuseppe. Because of the scarce financial resources only the eldest could attend school, while Raimondo tried to learn something through a priest and then with the pharmacist of the country; in the Austrian area, in Lviv, the Franciscans settled, who known the Kolbe, proposed to the parents to welcome in their college the first two older brothers; they knew that in the Russian area where they resided they could not give an intellectual and Christian direction and formation to their children, because of the prevailing regime, they condescended; indeed free now of the care of the children, July 9, 1908, decided to enter themselves in a convent, Julius in the Franciscan tertiaries of Krakow, but died killed is not known well by the Germans or the Russians, for his patriotism, while the mother Mary became a Franciscan in Lviv. Even the third son Joseph, after a period of Benedictine retirement, entered the Franciscans. The two brothers Francesco and Raimondo from the college both passed into the Franciscan novitiate, but the first, later went out dedicating himself to the military career, taking part in the First World War and disappearing in a concentration camp. Raimondo became Massimiliano, after the novitiate he was sent to Rome, where he remained six years, graduating in philosophy at the Gregorian University and in theology at the Seraphic College, being ordained a priest. April 28, 1918. In his stay in Rome two particular facts occurred, one regarding his health, one day while playing ball in the open country, he began to lose blood from his mouth, was the beginning of a disease that with ups and downs the he accompanied throughout his life.
Then in those times influenced by Modernism and harbingers of totalitarianism both on the right and on the left, which were advancing rapidly, while Europe was heading for a second world war, Massimiliano Kolbe was not yet a priest, he founded with the permission of his superiors ” Militia of the Immaculate “, a religious association for the conversion of all men through Mary.
Returning to Poland in Krakow, despite being a graduate with honors, due to ill health, it was practically useless in teaching or preaching, not being able to speak for a long time; so with the permission of the superiors and the bishop, he dedicated himself to his invention of Marian devotion, the “Militia of the Immaculate”, gathering numerous adhesions among the religious of his Order.
Joe N2CX had come up with an idea for a portable antenna for NPOTA use that covered the 40/30/20 m bands. This pairs nicely with the LNR MTR3B as well.
The QRP Guys worked with Joe to create a kit and a wind winder element to it.
Basically its a 1/4 wave on 20m with inductance being switched in as needed for the other 2 bands.
As per the QRP Guys manual https://qrpguys.com/wp-content/uploads/2018/05/tri-band_vertical_assy_042918.pdf I went ahead and an hour later I was ready for testing.
SWR on 20m is below 1.3, and the other bands are under 2 to 1 depending on the frequency.
A great piece of kit for the antenna box
The fiberglass rod is the chinese 7m fish pole that was $12 US


Thanks to the DARA Venture Crew 73 for the souvenir patch from the Hamfest

